Tuesday, 21 January 2014
21/01/2014
i am going to experiment and practice applying make up in photoshop. I will then do a shoot and then begin to edit them by using the make-up effect.
Friday, 17 January 2014
Mapplethorpe style(studio) Work Dairy
Mapplethorpe Style(studio)
In the beginning of this lesson we watched a documentary on Robert Mapplethorpe's photography. After this i went to shoot photographs which had been inspired by Robert Mapplethorpe in the studio.

 In my first image i have photograph captured the back of the subject, I liked this photograph as it not obvious what is it, therefore a sense of mystery is created. The dark colours of her top contrast the white background. Lastly there is no emotion being shown through the photograph.
In my second image i captured less than half of the subjects body which is to one side of the composition. The majority of the composition is taken up by the background. A contrast is created between what is in the image to what is not in the image.
If i was to continue with Mapplethorpe style in the studio i would like to concentrate on having a hand or an object coming from one of the corners of the compositon.
In the beginning of this lesson we watched a documentary on Robert Mapplethorpe's photography. After this i went to shoot photographs which had been inspired by Robert Mapplethorpe in the studio.


In my second image i captured less than half of the subjects body which is to one side of the composition. The majority of the composition is taken up by the background. A contrast is created between what is in the image to what is not in the image.
If i was to continue with Mapplethorpe style in the studio i would like to concentrate on having a hand or an object coming from one of the corners of the compositon.
Mapplethorpe style(location) Work Dairy
Mapplethorpe style(location)
In the beginning of this lesson we watched a documentary on Robert Mapplethorpe's photography. After this i went to shoot photographs which had been inspired by Robert Mapplethorpe on location.
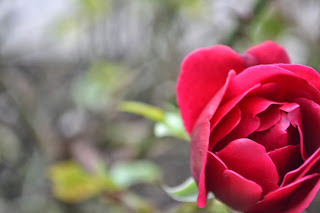
I was inspired to take this first photograph as Robert Mapplethorpe liked to have a contrast of what was in the photograph against what was not in the photograph. In my photograph i decided to capture the flower in the corner of the composition as that it was not taking up the majority of the composition. The majority of the composition is then replaced by a meaningless background.
 I was inspired to take this photograph as Robert Mapplethorpe's photograph are very simplistic. I made my photograph simple by only showing a section of the subject and the wall taking up the majority of the composition. Also the section of the face that the audience can see has a neutral facial expression therefore no specific emotion is being portrayed through the photograph.
If i was to continue with Mapplethorpe style on location i would like to experiment more with the simplicity of the photograph and carry on having the majority of the composition being taken up by the background.
In the beginning of this lesson we watched a documentary on Robert Mapplethorpe's photography. After this i went to shoot photographs which had been inspired by Robert Mapplethorpe on location.

I was inspired to take this first photograph as Robert Mapplethorpe liked to have a contrast of what was in the photograph against what was not in the photograph. In my photograph i decided to capture the flower in the corner of the composition as that it was not taking up the majority of the composition. The majority of the composition is then replaced by a meaningless background.

If i was to continue with Mapplethorpe style on location i would like to experiment more with the simplicity of the photograph and carry on having the majority of the composition being taken up by the background.
Free Shoot Work Dairy
Free Work Dairy
In this lesson we was able to go into the studio and have a free shoot, this allowed me to take photographs of whatever i wanted which would have a positive impact on my work i have so far. I experimented with the background and was able to create a real white background and a real black background.
 In my first image i was able to create a white background which almost make the subject appear to have been placed in the image. I wanted the subject to be in the center of the photograph so that the audience would focus on her. I would have liked to have the subject wearing darker clothes so that she could stand out even more from the white background.
 In my second image i created a black background by stopping any light hitting the backdrop. I decided to only capture the hair in the corner of the photograph as i feel it creates a sense of mystery and makes the audience wonder who hair it is. A large amount of the composition is being taken up by the background which i liked as it is different from many photograph as they usually have a large amount of the composition taken up by the subject
If i was to continue with my frees shoot i would like to experiment more with the white background by using it in a way in which the appears to be floating.
In this lesson we was able to go into the studio and have a free shoot, this allowed me to take photographs of whatever i wanted which would have a positive impact on my work i have so far. I experimented with the background and was able to create a real white background and a real black background.


If i was to continue with my frees shoot i would like to experiment more with the white background by using it in a way in which the appears to be floating.
Contrast Two Work Dairy
Contrast Two Work Dairy
In this lesson i went out to shot contrast again as i realized that contrast can be seen within opposites such as black and white, up and down and on and off.
Here are my two most successful images from contrast

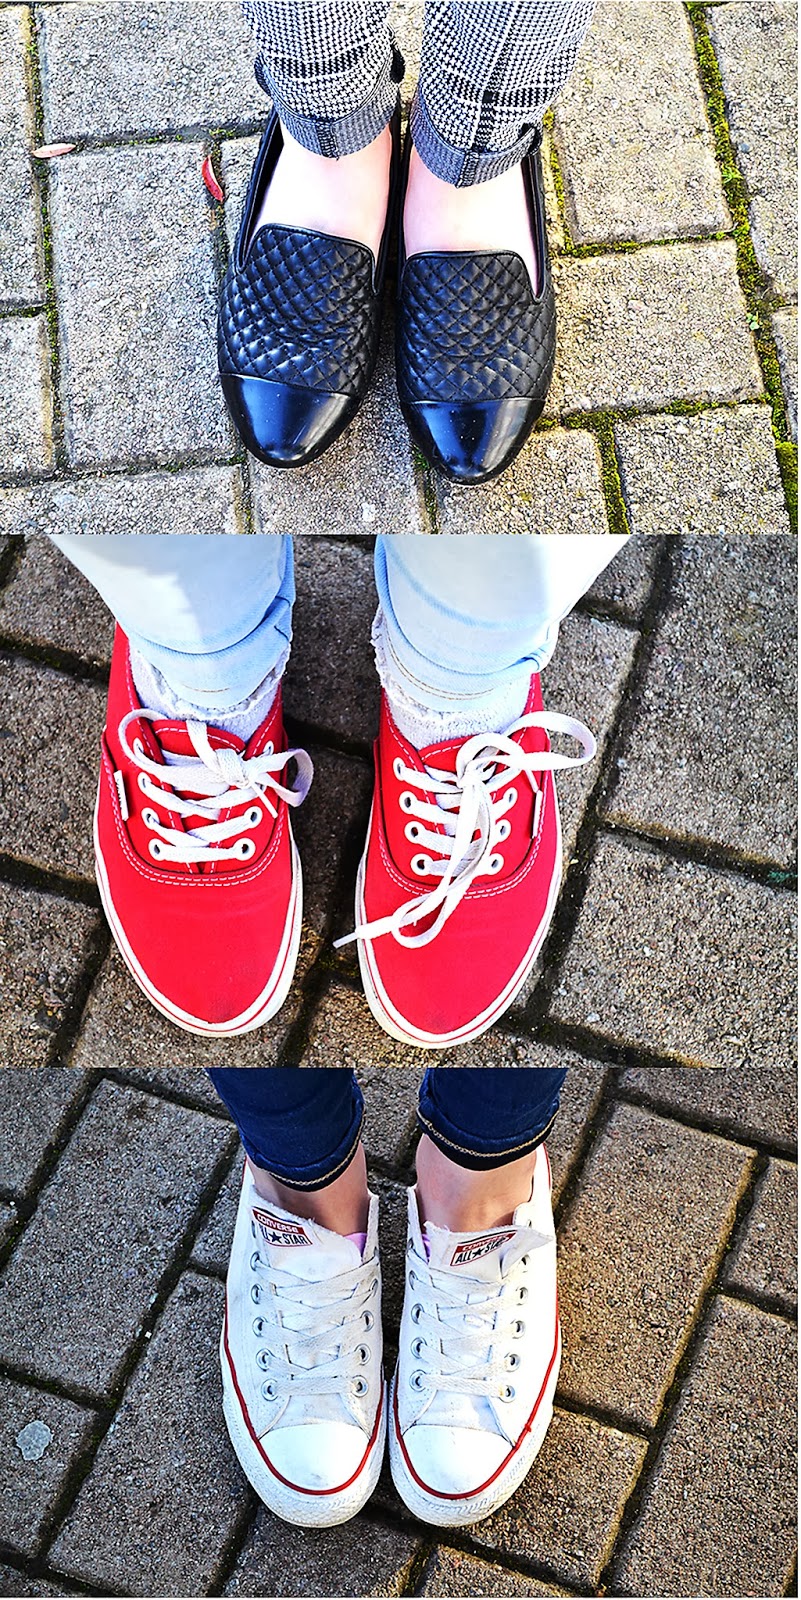
 In my first image i wanted to show the contrast of colour and i chose to use red, white and black. I want to take individual images of the colours and then place them next to each other to make the contrast clear to the audience.
In my second image i wanted to show the contrast of light and dark s i decided to show it through different colour hair.
I placed both of the people nest to each other
but only showing half of each person head so
that each colour would be seen equally.
If i was to continue with contrast i would like to experiment with contrast within race and culture as i feel this would be interesting for the audience.
In this lesson i went out to shot contrast again as i realized that contrast can be seen within opposites such as black and white, up and down and on and off.
Here are my two most successful images from contrast
 In my first image i wanted to show the contrast of colour and i chose to use red, white and black. I want to take individual images of the colours and then place them next to each other to make the contrast clear to the audience.
In my second image i wanted to show the contrast of light and dark s i decided to show it through different colour hair.
I placed both of the people nest to each other
but only showing half of each person head so
that each colour would be seen equally.
If i was to continue with contrast i would like to experiment with contrast within race and culture as i feel this would be interesting for the audience.
Contrast One Work Dairy
Contrast One Work Dairy
In this lesson i shot images of contrast. At first i didn't really understand what this mean however when looking around i realized that there are contrasts everywhere around us.
Here are my two most successful images of contrast
 My first image is showing contrast through light and dark. The shadowed areas is contrasting the area that is in the light. I edited the image to make the section in the light much brighter so that it stands out from the dark area even more.
 My second image is showing the shadow of a stair case on to a wall. The fact that the shadow is black, this make it contrast the wall which is lighter than the shadow. When editing the images i made the shadow sharp and defined to make the contrast more obvious.
If i was continue with contrast i would like to show contrast through opposites such as on and off and high and low.
In this lesson i shot images of contrast. At first i didn't really understand what this mean however when looking around i realized that there are contrasts everywhere around us.
Here are my two most successful images of contrast

 My second image is showing the shadow of a stair case on to a wall. The fact that the shadow is black, this make it contrast the wall which is lighter than the shadow. When editing the images i made the shadow sharp and defined to make the contrast more obvious.
If i was continue with contrast i would like to show contrast through opposites such as on and off and high and low.
Walk Two Work Dairy
Walk Two Work Dairy
In this lesson, as a class, we went out for a walk to continue with autumn colours and also images that show quiet refection within nature. I tried to look at the image in a way in which people could relate to the image.
Here are my two most successful images from the walk

 In my first image i wanted to show how people are individual in society through leaves. By editing the leaves so that one is in colour is showing individuality as well as a journey that is still going on.
In my second image i wanted to show someones journey. The path in the image is then representing the the path of life. I liked the way that the path was in the centre of the composition as it sets the central focus for the image.
If i was to continue with the walk i would have liked to takes some images of the sky as it would be very simple however people would be able to get lost within the image.
Walk One Work Dairy
Walk One Work Dairy
In this lesson we went for a walk initially to take image of autumn colours however we also found many other things we could take a photograph of which showed the formal elements
Here are two of my most successful image from going on the walk.


In my first image i wanted to show the height of the trees so i took the photograph from a low angle to emphases how tall the trees are. Also the image also looking like the trees are closing in which is showing depth.
In my second image i wanted to capture what you see when looking out of the forest. I like that it appears to be lighter outside of the tree which could portray that it is safer than inside the forest.
If i was to continue with this walk, i would like to try and find more autumn colours within the forest as i was unable to do this last time.
Studio 2 Work Dairy
Studio Work Dairy- Autumn colours
In this lesson i went out and found autumn leaves and then when in the studio to lay them out as i wanted them to show autumn colours in a more create way rather than taking a photograph of a tree.
Here are my two most successful images in showing autumn colour.

 In my first image i wanted to make it simple but still effective in showing autumn colours. I decided not to fill the whole of the frame in this image as i wanted the colours to stand out from the background.
In my second image i decided to feel the frame with the leafs to make the colours the central focus. I decided to use of the leafs which where red, yellow or brown so that they all contrast each other well and to show the obvious autumn colour everyone knows.
If i was to continue with autumn colours in the studio i would like to focus on individual leaves and zoom in to just show the colour but still make it obvious that it is a leaf in the photograph.
Studio 1 Work Dairy
Studio Work Dairy
In this lesson i did a shoot in the studio to take photographs of form on the face. I changed the lighting and background to create the best shadows on the face. By experimenting with the different backgrounds i was able to see which one looks better with the harsh lighting that i had to use to create the shadows.
Here are two of my most successful images

 In the first image i used a dark backdrop which meant i used harsh lighting to create the shadow on objects face.
In my second image, i used a white back ground to make the image more shuttle however i set up the lighting to create the shadow on half of the objects face.
If i was to continue with form in the studio i would like to try and create shadows on other parts of the body or clothes to show form rather than just the face.
Form Work Dairy
Form Work Dairy
In this lesson i made a image bank on form and then went out side to shoot photographs of form by using shadows to make the 2D image show the 3D element of the object in the photograph.

 Here are two of my most successful image in showing form. In the first image you can simply see that one side of the wall is in the light and the other side is shadow. Therefore this makes the wall appear 3D in the 2D image.
In my second image the metal trolley is creating shadow of lines all on the wall behind it. This is showing form because for the trolley to create this shadow it must be 3D.
If i was to continue with form i would like to try and show form on the face as i found this hard in today's lesson due to light not being harsh enough to create strong shadows on the face.
Reflection Work Dairy
Reflection Work Dairy
In this lesson i made an image bank on reflection and then went out to shoot reflection. I found it fairly easy as reflection can be shown in many places however i was unable to take a image where the refection is distorted.
Here are my two of my most successful images.


In the first image i took a self portrait in a glass window, this was effective as the reflection was clear.
In my second image i though it was effective to have the object in the image as well as the reflection.
If i was to continue with reflection i would try and capture some images where the reflection is distorted such as the reflection in a car.
Texture Work Dairy
Texture Work Diary
In this lesson i made i made an image back on texture which included images that effectively showed texture. I then went out to shoot texture by using the light to clearly show the texture.


Here are my most successful images as they both use the light effectively in emphasizing the texture. They are both of a tree trunk and the rough texture that they have.
The first image is showing the texture of the tree trunk to be bumpy and rough. The angle that i have taken it at allows the audience to see the texture well
The second image is of a branch on a tree. The light hitting the branch had enabled me to show the texture in the image as it shows the individual bumps within it.
If i was to continue with texture i will always insure that i am using the light appropriately and that it emphasizes the texture effectively.
Tone Work Dairy
Tone Work Dairy
In this lesson i made an image bank on tone which included image that i found interesting and then i annotated them. When going out to shoot tone i found it very hard to figure out whether there will be a visible tone when i was taking the image in colour.


Here is my most successful image as i feel it showed the most tone out of all my image. Although this image is just simply a light and dark colour next to each other i feel it was my best image as it has the darkest tone and the lightest tone within the image.
The second image i feel is my least successful as it was all one tone. This is due to me finding it hard to look for different tones when shooting in colour.
If i was to continue with tone i would take the images in black and white to have more successful images as i will be able to see the different tones much easier.
Depth Work Dairy
Depth Work Dairy
In this lesson i made an image bank on depth which included image that i found interesting and then i annotated them. When i went out to shoot depth i found it easy as it all depended on the angel you took the image at which i feel i am good at.


Here are my two most successful photographs on depth. Both of them have the effect that the image is coming to point.
In my first photograph i decided to have a person nearest to the camera as i felt this added to the depth as the person was the biggest and it made the wall seem like it goes on for longer
.
In my second it is simply just a wall however by me taking it at a certain angle it added depth to the image.
If i was to continue with depth i would take more images which include a subject as i feel it adds to the depth of the image.
Shape Work Dairy
Shape Work Dairy
In this lesson i made an image bank on shape which showed images that i found interesting that showed shape and then annotated them. When i went out out to shoot shape i found it fairly easy as everything is a shape from a window to a building.

 One way of showing shape is through shadows like i have in my photograph. I feel this image was successful as it showed shape in a different way like a silhouette.
In my second image, it is more of a simple approach to showing shape as it is simply as circle. Although this image is very simple it still establishes shape within the photograph.
If i was to continue with shape i would try and find more interesting ways to show shape and take more images in the first shoot even if they are simple.
Blurring Work Dairy
Blurring Work Dairy
In this lesson i made an image bank on blurring which contained image that i found interesting which demonstrated blurring and then annotated them. Before i could go out and shoot blurring i have to change the shutter speed to a low number to get the blurring effect. I found blurring quite hard as sometime the whole object would turn into a blur which would not show any movement.

These are two of my photographs that i took to show blurring. In the first image i moved the camera which therefore was not as effect. This then made me realize that i have to move the object like i did in my second image which had a better effect in showing movement in a photograph. This photograph also shows the speed of the movement due the long blurred lines coming from the shoes.

Subscribe to:
Comments (Atom)